Using GitHub repository as binary cache server
It is possible to upload Hunter binary cache to the server.
Next shown an example of using GitHub as a hosting. All big raw *.tar.bz2 archives
uploaded as assets to release with names cache-* (directory layout does not
matter) and all small text files with meta information uploaded directly to
branch master (directory layout matters) (see
hunter-cache as example).
Note
If you have shared folder in your network there is no need to use
any scripts, you can just set HUNTER_ROOT variable to location of this
directory.
Note
Currently upload procedure is implemented using Python script with
requests and gitpython modules, check that you have Python installed
in your system. This limitation will be removed in future. Downloading from
server done by file(DOWNLOAD ...) CMake commands, so client is still
CMake-only based. Module gitpython expects Git executable installed in
system. You can use environment variable
HUNTER_GIT_EXECUTABLE
to specify custom path.
Example
Next example will show how to setup GitHub binary cache server:
Which will be managed by bot account:
Cache will be uploaded for CI jobs in repository:
Diagram:
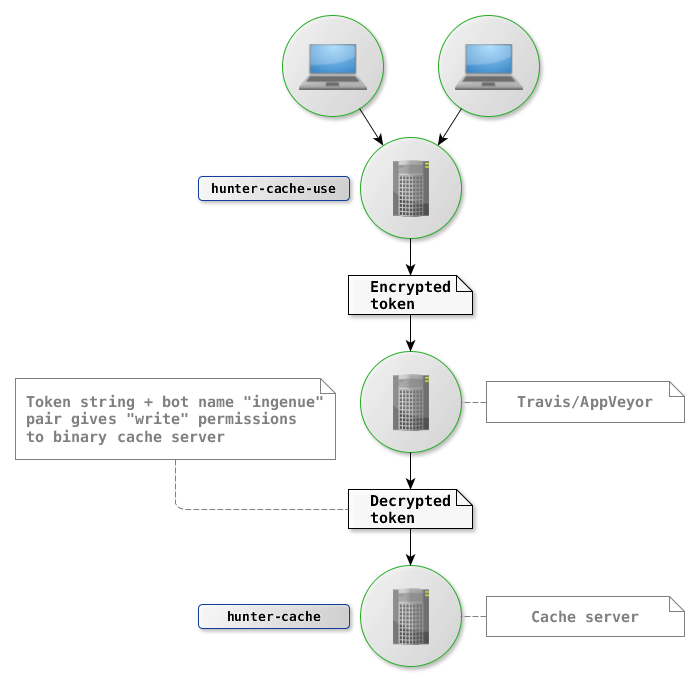
Workflow:
- Users push code to
hunter-cache-userepository hunter-cache-useCI configs hold encrypted token- When encrypted token reach CI, CI knows how to decrypt it
- Using decrypted token CI can act on bot behalf and upload binaries
- Binaries can be reused by anybody who have added
hunter-cacheto theHUNTER_CACHE_SERVERS
Setup
Direction of setup procedure is inversed:
- Create cache server
- Create bot account
- Create token
- Give bot write access to cache server
- Encrypt token
- Save token in CI configs
Create cache server
Create repository with at least one file:
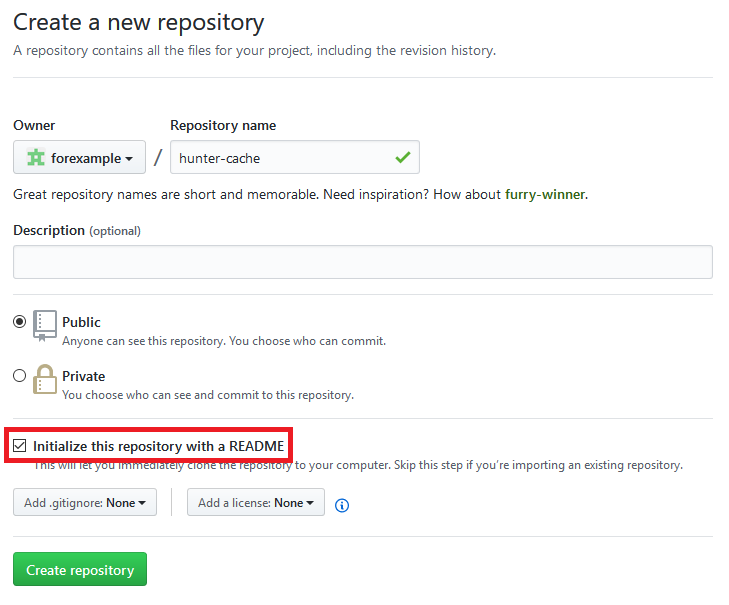
Note that if repository will be empty it will not be possible to create tags for assets.
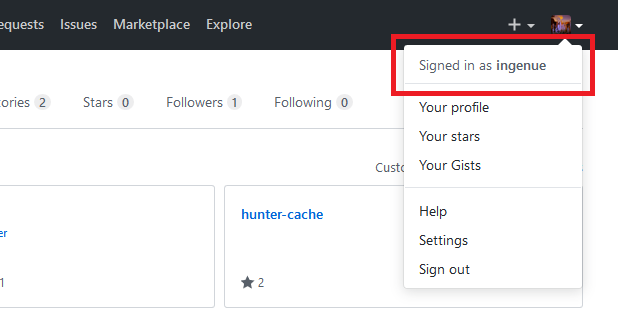
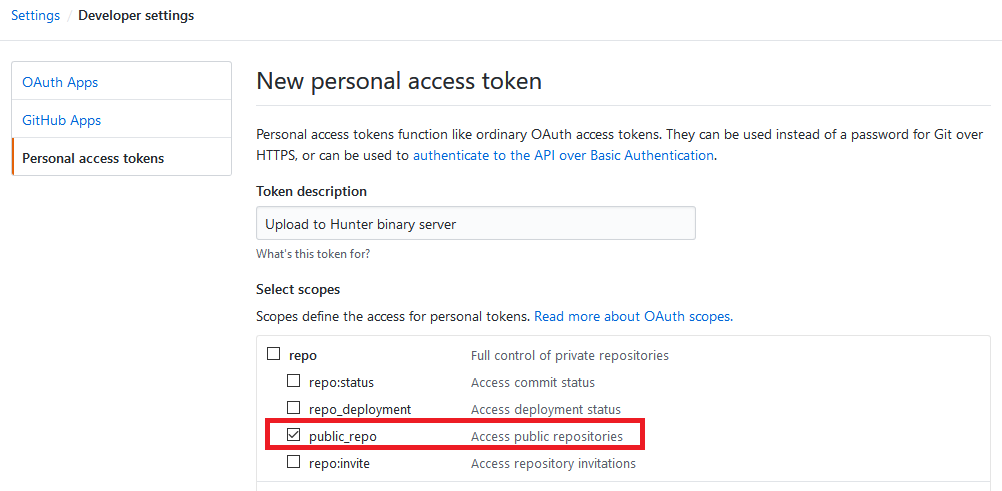
Create bot token
Login to GitHub with the bot account, in our case it’s ingenue:
:

Set public_repo check-box and create token:
Note
Keep you token private! It’s the same as your password!
See also
Access
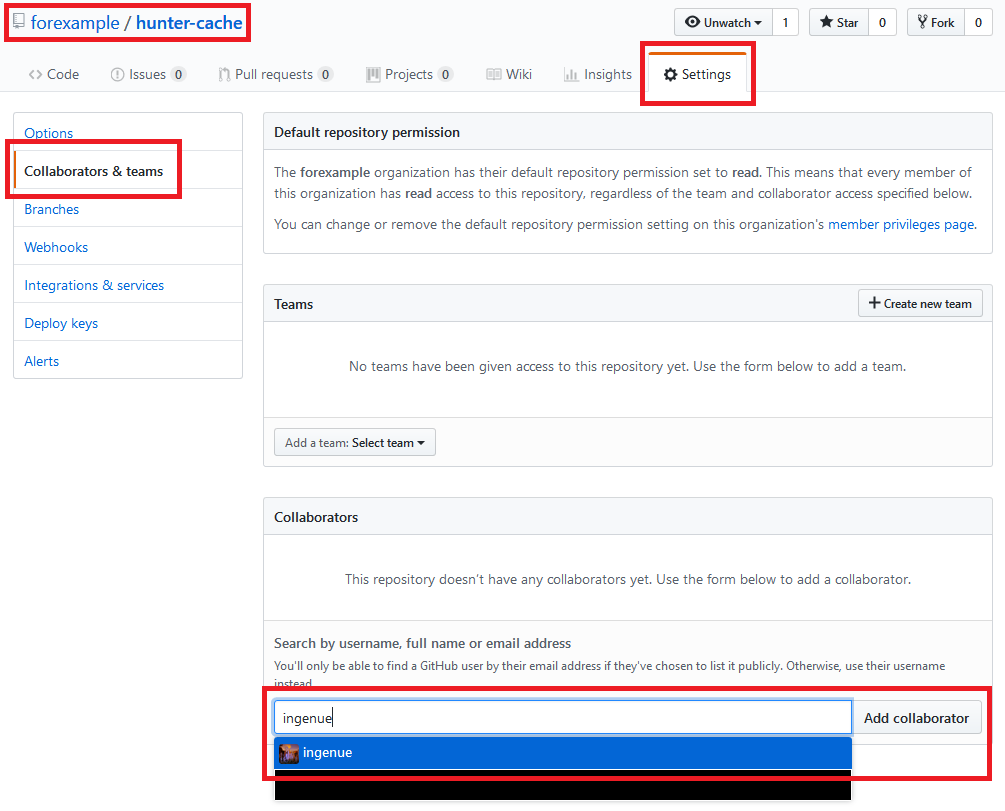
Add ingenue bot as a collaborator to hunter-cache:
Note
Bot doesn’t interact with hunter-cache-use so there is no need
to set any permissions there.
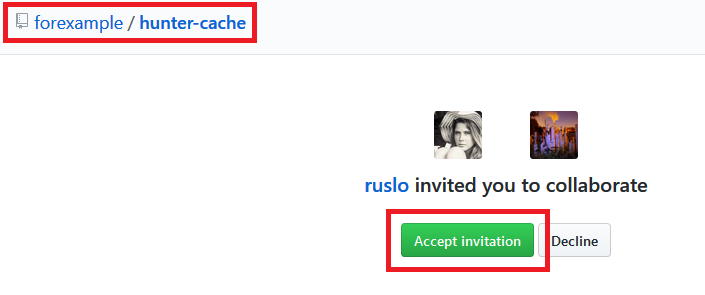
You should receive email about invitation. Login as bot and accept it:
Travis CI
Now we will save token as a secured environment variable
GITHUB_USER_PASSWORD in Travis and AppVeyor.
Note
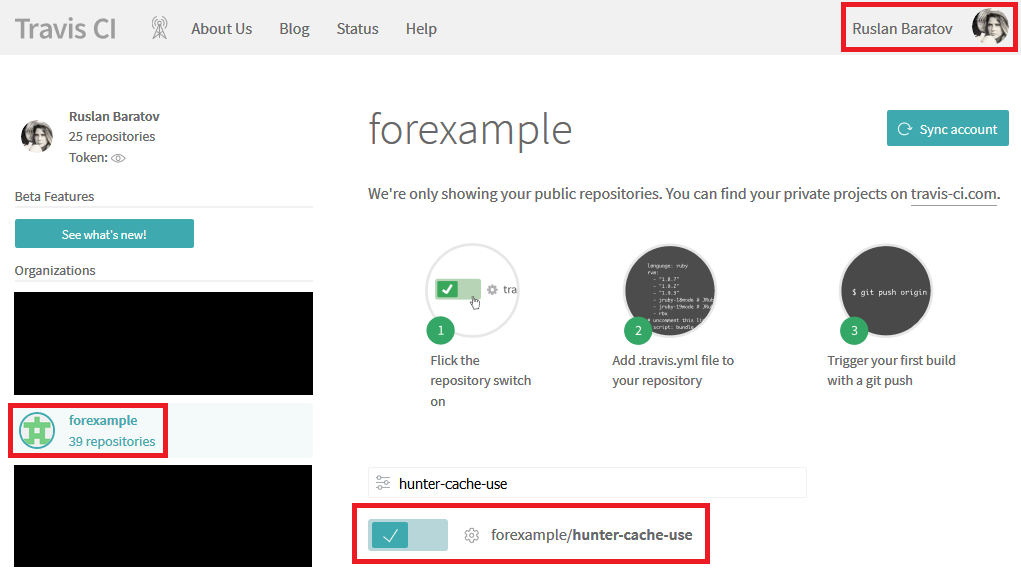
Visit https://travis-ci.org and register hunter-cache-use repository
there.
Excerpts from documentation (1 and 2) for OS X (see also this repo):
> gem install travis # for Ubuntu it will be 'sudo gem install travis'
If you have problems with installing travis try to install
ruby from brew:
> brew install ruby
Login with account with which you have registered repository for CI.
In my case it’s my personal account ruslo:
Login with ruslo (add --pro if repository is private):
> travis login
We need your GitHub login to identify you.
This information will not be sent to Travis CI, only to api.github.com.
The password will not be displayed.

Try running with --github-token or --auto if you don't want to enter your password anyway.

Username: ruslo
Password for ruslo: xxxxxx
Two-factor authentication code for ruslo: xxxxxx
Successfully logged in as ruslo!

> travis whoami
You are ruslo (Ruslan Baratov)
Encrypt token:
> travis encrypt -r forexample/hunter-cache-use GITHUB_USER_PASSWORD=62xxxxxx2e
Please add the following to your .travis.yml file:

  secure: "EWdxxxxxxfkk="

Pro Tip: You can add it automatically by running with --add.
And add it to .travis.yml:
env:
  global:
    - secure: "EWdxxxxxxfkk="
See also
AppVeyor
Note
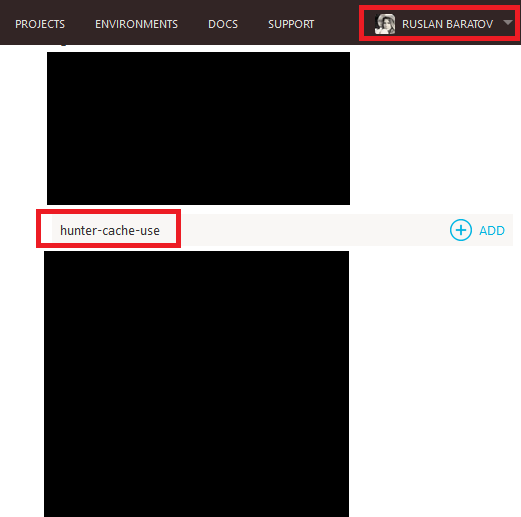
Visit https://appveyor.com and register hunter-cache-use repository
there.
Note
You may want to turn on feature:
Enable secure variables in Pull Requests from the same repository only
Login with account with which you have registered repository for CI.
In my case it’s my personal account ruslo:
While being logged in with the same account use this form to encrypt bot token:
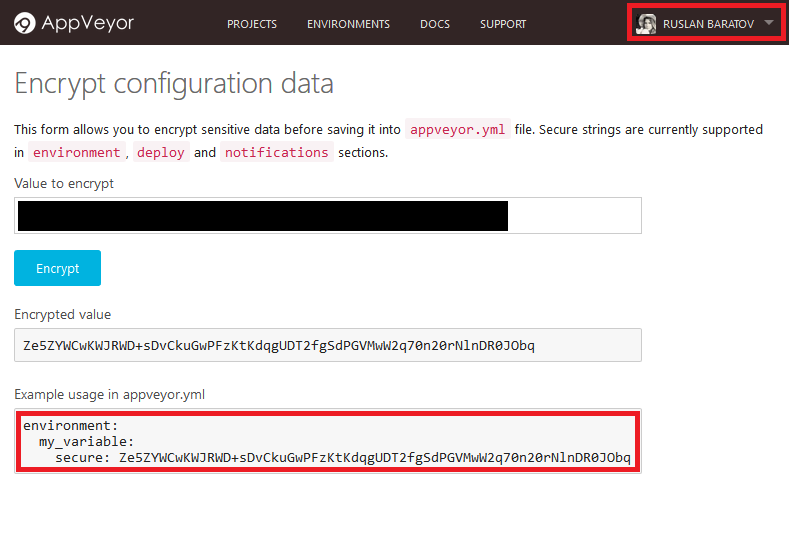
Add it to the appveyor.yml:
environment:
  global:
    GITHUB_USER_PASSWORD:
      secure: Ze5xxxxxxObq
See also
CMake code
CI systems are ready, now let’s do CMake code.
Note
CMake variables for Hunter should be set to cache before HunterGate, see
HUNTER_CACHE_SERVERS is a list of servers we will
use to download binaries. We need only one server
https://github.com/forexample/hunter-cache:
set(
    HUNTER_CACHE_SERVERS
    "https://github.com/forexample/hunter-cache"
    CACHE
    STRING
    "Default cache server"
)
We want HUNTER_RUN_UPLOAD to be set to ON by
default only when it’s a CI server and secured variable
GITHUB_USER_PASSWORD
is defined. In practice it means:
- Upload will be triggered when new commit pushed to branch
- Upload will be triggered when pull request opened basing on branch of the same repository
- Upload will not be available when pull request opened basing on branch from another repository
- If
GITHUB_USER_PASSWORDenvironment variable defined on local machine there will be no upload by default - If
GITHUB_USER_PASSWORDenvironment variable defined on local machine andHUNTER_RUN_UPLOAD=ONadded by user upload will happen
string(COMPARE EQUAL "$ENV{TRAVIS}" "true" is_travis)
string(COMPARE EQUAL "$ENV{APPVEYOR}" "True" is_appveyor)
string(COMPARE EQUAL "$ENV{GITHUB_USER_PASSWORD}" "" password_is_empty)

if((is_travis OR is_appveyor) AND NOT password_is_empty)
  option(HUNTER_RUN_UPLOAD "Upload cache binaries" ON)
endif()
File with passwords:
set(
    HUNTER_PASSWORDS_PATH
    "${CMAKE_CURRENT_LIST_DIR}/cmake/Hunter/passwords.cmake"
    CACHE
    FILEPATH
    "Hunter passwords"
)
There will be no real passwords there, only configuration
for repositories and instruction to read password from environment variable
GITHUB_USER_PASSWORD:
# cmake/Hunter/passwords.cmake

hunter_upload_password(
    # REPO_OWNER + REPO = https://github.com/forexample/hunter-cache
    REPO_OWNER "forexample"
    REPO "hunter-cache"

    # USERNAME = https://github.com/ingenue
    USERNAME "ingenue"

    # PASSWORD = GitHub token saved as a secure environment variable
    PASSWORD "$ENV{GITHUB_USER_PASSWORD}"
)
Full project available here: